Install OS X El Capitan on Virtual Machines
Use the Links below to install OS X on Virtual Machines like Virtualbox or Vmware. But if you want to Install VMware tools then you must Install OS X on Vmware before going ahead.
How to install Mac OS X El Capitan On VirtualBox? How to install Mac OS X El Capitan 10.11 on Vmware?
Install VMware Tools on Mac OS X El Capitan
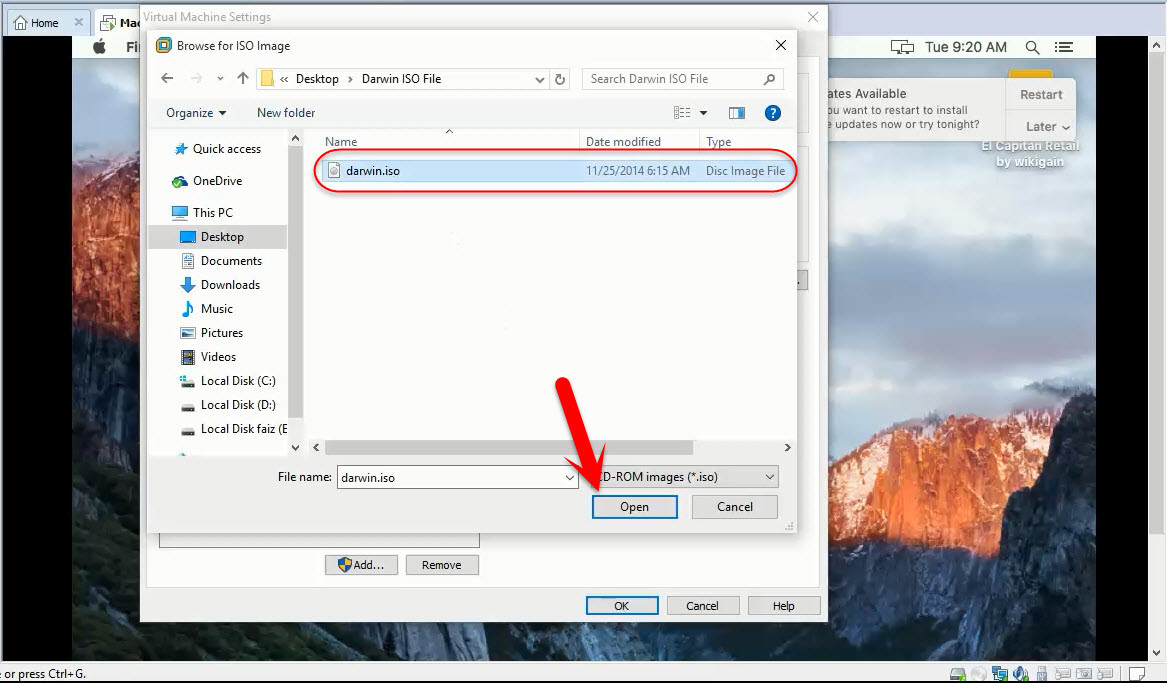
Step #1. Download Darwin.ISO from the link below and place it on your desktop.
Darwin.ISO »>Downlaod«<
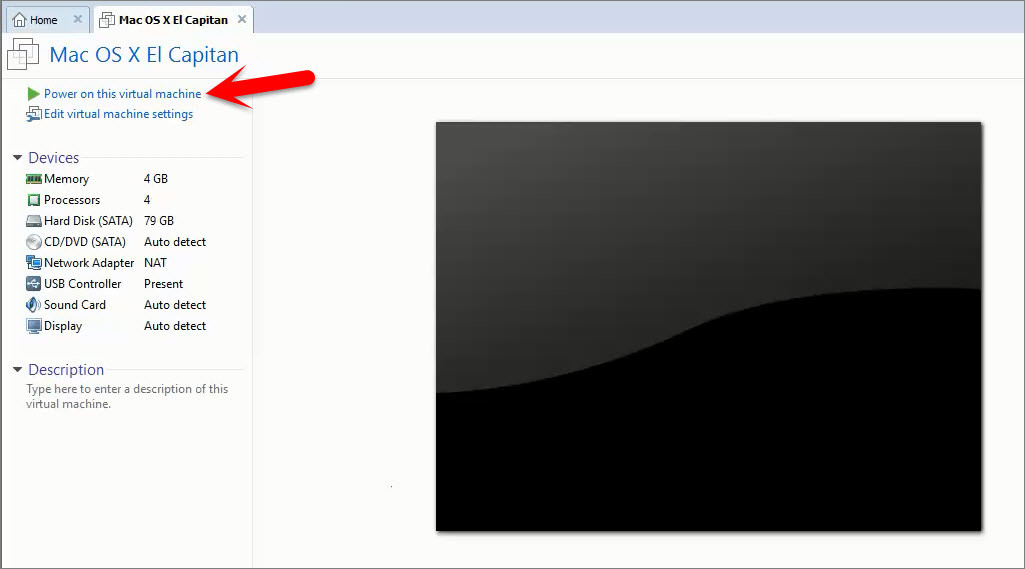
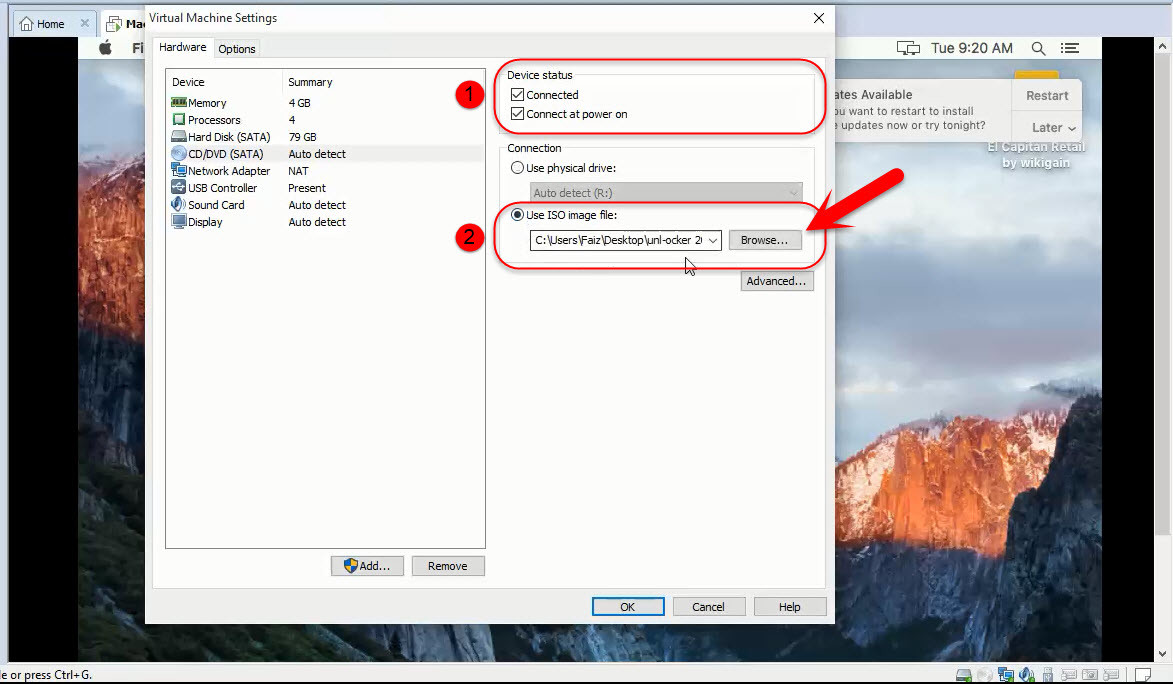
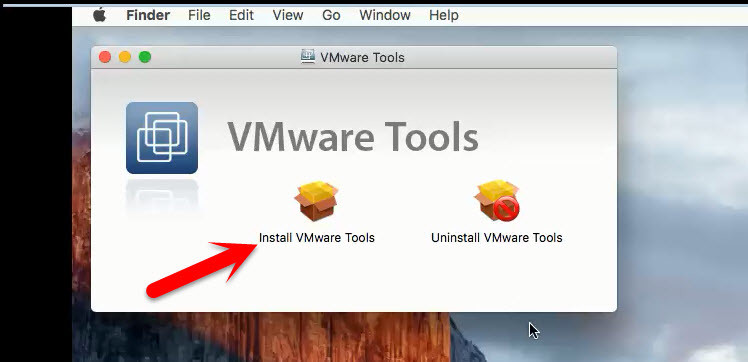
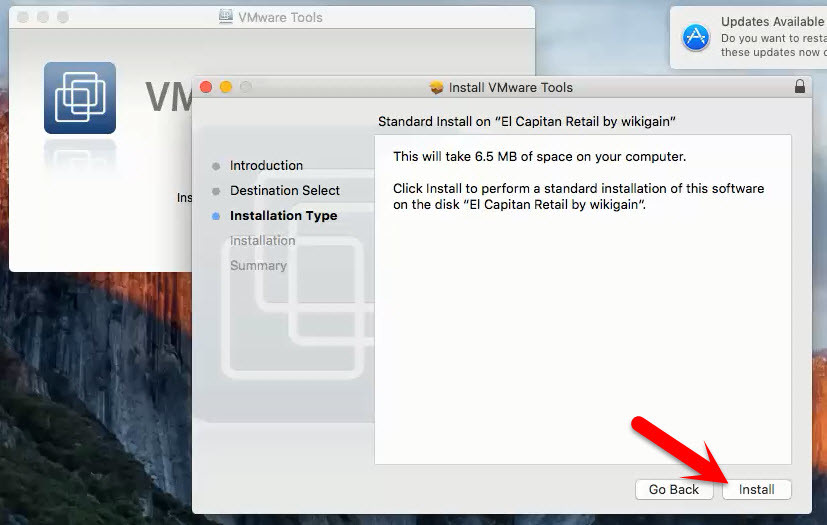
Step #2. Power On the Mac OS X El Capitan VM that you want to install VMware tools on it. Step #3. Enter your Password and log In into your Account. Step #4. Right Click on the Mac OS X El Capitan tab then click on Removable Devices > CD/DVD (SATA) > Settings. Step #5. From the Devices Status, Check the box of Connected and Connect at power on. Then from Connection section “Select Use ISO image file:” and click on browse. Step #6. Now Navigate and select the Darwin.ISO file that you download from the link in step 1 and click Open. Step #7. Now on the Virtual Machine settings click on OK to save the changes that you made. Step #8. After that go to OS X VM and enter full-screen mode, Wait a while for the file and then it will run automatically, so when VMware tools dialog box appears then click on Install VMware Tools. Step #9. On introduction Page click on Continue. Step #10. Then click on Install. Step #11. Again click on Continue Installation. Step #12. Then type your Password and click on Install Software to allow this. Step #13. Wait for Installer to complete the installation process and when the installation was Successful then click on Restart to finish installing the software.
Done Installation
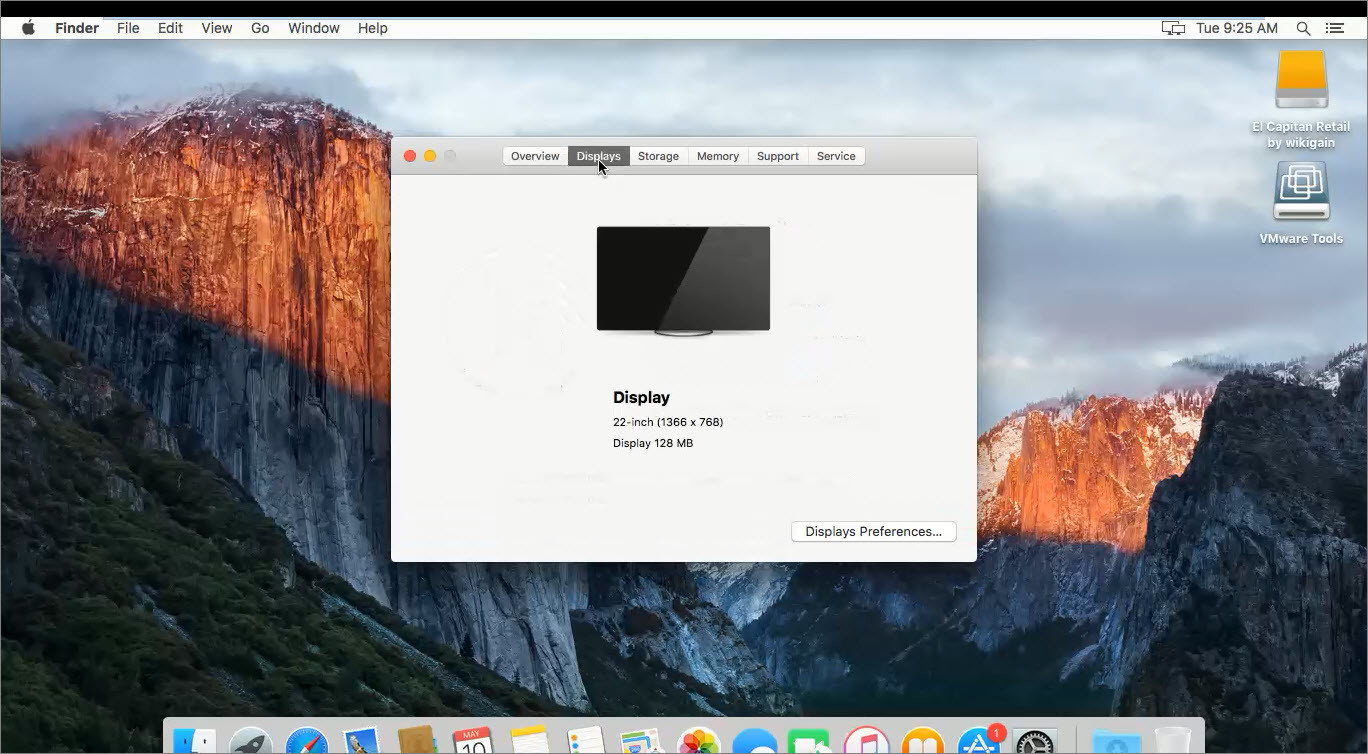
So when your OS X VM reboots then Vmware tools is installed on your VM and it must work perfectly like Auto selecting the Display Size and other drivers. This was all about, how to install VMware tools on Mac OS X El Capitan. If you faced any problem tell us below by comment, feel free to tell us. we’re waiting for your suggestion.
