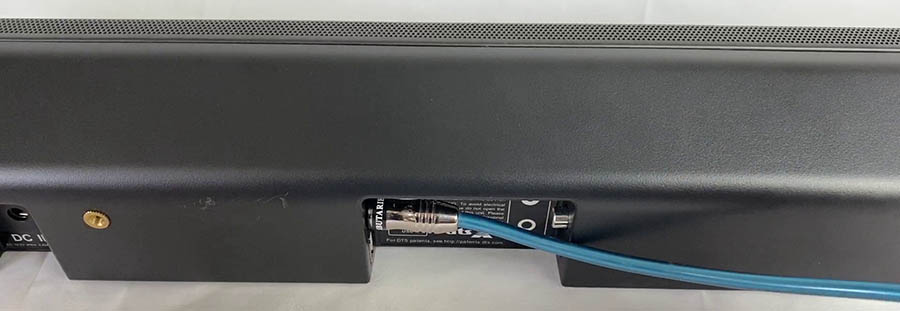
You have several options for connecting your soundbar to your television, including:
Digital Optical Audio (aka Toslink)HDMIHDMI ARCBluetoothAUX (aka Auxiliary or 3.5mm)RCA
But these methods aren’t created equally. They have different pros and cons, that you may prefer to use for different purposes. If you use your home theater to watch movies with the highest quality audio available, that may push you to do something different than if you’re just watching “normal” TV. To get the most out of your soundbar, be sure to read through the options below and choose what works best for you.
Digital Optical Audio (aka Toslink)
The most common audio connection method for modern soundbars is via a Digital Optical Audio Cable, although, we do have tutorials on specific devices like Echo Dots and soundbars. These are sometimes referred to as Toslink or SPDIF cables. They have a square-ish connect with a little circle in the middle, and they’re a little more rigid than other cables because they have a fiber-optic cable (read: glass) inside. This is one of the easiest methods to connect your soundbar to your Television because it’s a single, slim cable that goes from one device to the other. There’s nothing to mess around with here, and that slim cable actually makes the cable management incredibly easy. To connect your soundbar to your TV with the digital optical cable, simply find the ports on both devices, then make sure the soundbar is positioned where it should be relative to the TV. Check both connections: digital optical ables are designed to go in with a firm “click”, so make sure when you’re installing the cable you hear and feel the connectors click into place. Then, you’re ready to use your optical cable to connect the devices and manage the cable. Because the cable is so light, it’s really easy to cool the extra cable up in a loose bundle and use a piece of tape to stick it to the back of the Television. Once you’re connected and both devices are on, try playing something. If the connection doesn’t “just work”, you may need to head to the setting out your Television and make sure it’s outputting sound to the digital optical connection. This may require you to find the Televisions internal speakers on the audio settings and set them to ‘OFF’, and if there are multiple output options you can select, look for ‘optical’ or ‘digital optical’, then select it.
HDMI (Connecting All Devices to the Soundbar)
First, let’s discuss what the difference between HDMI and HDMI ARC is. We have a more thorough article on HDMI ARC, but the quick and dirty of it is: HDMI ARC is a way to reduce the number of cables and remote controllers you need by allowing the Television and Soundbar to communicate with each other via a special Audio Return Channel (ARC). This means that you can connect all of your video/audio sources to the Television directly, not the soundbar, and then connect only one cable from your Television to the soundbar. Once the Television and soundbar are connected via the HDMI. But there are certainly cases where you don’t want to use an HDMI ARC connection, or you may simply have a Television or soundbar that isn’t equipped with an HDMI ARC port. This is not a huge problem: it just means that you need to connect all of your HDMI sources to the soundbar, using the soundbar as a receiver that can then pass the video “upstream” to the Television. To connect your devices without using ARC, connect all of your video sources to the soundbar first, and then use the soundbar’s HDMI out port to connect it to the TV. This will ensure that the highest quality sound is getting to the soundbar, because if you hook the system up the other way, through the TV and then to the soundbar, the TV may do some audio processing on the audio signal. Even if you do have HDMI ARC ports on both your Television and soundbar, you might want to connect your devices up this way to get the best sound quality. HDMI ARC is limited to 5.1 channel sound, and it can’t handle advanced audio standards like Dolby Atmos or DTS:X.
HDMI ARC (Connecting All Devices to the Television)
As described above, HDMI ARC is a great way to simplify your setup, although it does have some limitations around not supporting more than a 5.1 channel setup, and with no support for advanced audio standards like Dolby Atmos and DTS:X. There is a new standard on the horizon: HDMI eARC, which will support those 7.1+ channel setups and advanced formats (a little more on that here). For the purposes of this discussion, though, HDMI Arc and HDMI eARC are interchangeable. If you do have more advanced equipment that has the eARC standard built-in, connecting your soundbar to your Television (and your computer – our guide) follows the same process as HDMI ARC. First, locate the HDMI ARC port on your Television and Soundbar. These look just like HDMI ports, but they’ll be labeled with ‘ARC’, so you know that’s the one to use. Then, using an HDMI cable that’s been manufactured in the last year or so (supporting at least HDMI 1.4), simply connect the two devices. The more complicated part is that all of your video sources need to be connected to the Televisions other HDMI-in ports as well, so you’ll need to connect those next and manage the cables however you see fit. Then, you can turn everything on and test the connections. Although HDMI should be automatic, HDMI ARC may need to be activated in your Televisions settings. Head over to the audio settings menu and look for a control that’s called ‘HDMI Arc’ or ‘HDMI Control’, and then make sure that’s set to ‘on.’
Bluetooth
Another option on the menu is to connect your soundbar to your Television (or Google Home Mini – our guide) using a Bluetooth connection.. This is certainly easier than the other options discussed from a cable management standpoint. It’s hard to beat wireless. That said, the thing that makes Bluetooth appealing from a cable management standpoint also causes some reduced audio quality issues that you may not want to tolerate. Even the most advanced Bluetooth standards don’t support the information transfer rates available on cabled options, which means the highest number of channels you can hope to support is a whopping two. And there’s another worry here: that wireless signal is probably competing for spectrum space in your house, with phones and a wireless router and any number of smart home devices. The signal can easily be disrupted. This can cause intermittent drop-outs in the audio signal or reduced quality (popping or fuzziness), that you don’t really have any control over. But, Bluetooth can be a good budget option, a sort of stepping-stone to making your setup functional while you plan the next upgrade. It’s a tool that’s handy to have in your toolbox, although it’s really there only to solve specific problems, not a solution for every setup.
AUX (aka Auxiliary or 3.5mm)
Auxiliary connections, also known as “AUX” or “3.5mm” connections, use the 3.5mm-to-3.5mm cables that you’re probably more used to seeing on the end of your headphones. Although Auxiliary cables offer the “one cable” simplicity of Auxiliary and HDMI ARC, they have all the limitations of Bluetooth. Namely, you’ll be limited to 2 channels, so advanced multi-channel setups and subwoofers are out. What’s more, AUX is a physical format, not digital. All the other methods discussed in this article are digital (with the one asterisk that RCA can technically be physical or digital depending on the cables and setup). That means that the Auxiliary cable can only transmit the physical sound signals of the left and right channels across its copper wires. No return channels like on HDMI ARC. No multiple channels at all like you get with HDMI and Optical. And no two-way communication which, technically, Bluetooth supports. This can be a problem because the actual sound information being transmitted is of the lowest quality, with any extra information that might be paired on the digital format compressed so that the bare-bones physical signal is the only thing transmitted. But maybe sound quality isn’t your goal here. Like Bluetooth, Auxiliary is a fantastic way to just get your setup up and running quickly while you plan your next move. It’s also a good option for mobile devices that don’t support Bluetooth, or when you want to connect to your mobile device directly to sidestep any wireless signal issues. Again, Auxiliary is a good tool to have in your tool chest, but it isn’t the final solution for connecting to your Television. For anything multi-channel, or when quality matters, you’ll want to use one of the digital options described above.
RCA
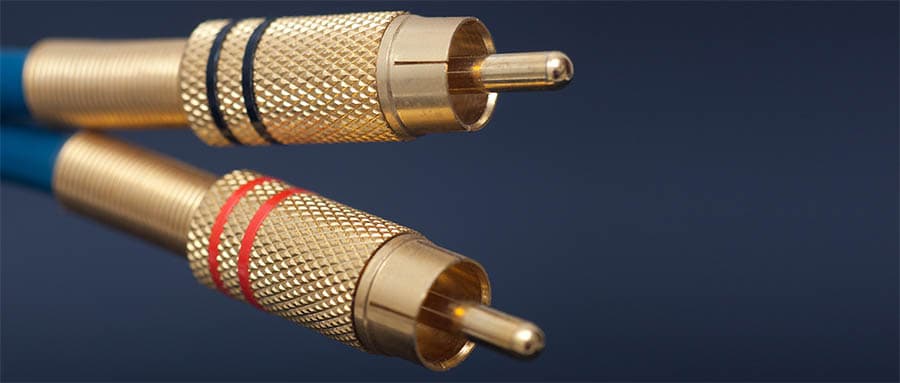
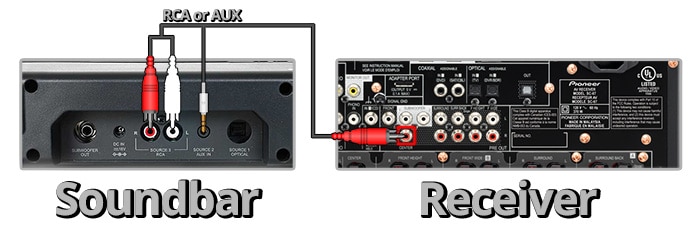
RCA stands for Radio Corporation of America. This is an old standard, dating back to at least the 1940s, when RCA (the company) standardized this as a way to connect to audio devices like phonographs and radios. If you want something higher quality, this is not the type of connection you’ll want to use. The RCA cables themselves can support a 2.1 channel setup, but the format is dated enough that it’s now getting somewhat obscure. It would be surprising if your Television and soundbar both supported RCA, and even if they do the channel limitation likely means you’ll want to use something like Optical or HDMI to get higher quality signals from your Television to your soundbar. RCA is an option, then, but it’s probably going to be your last resort. Higher-end soundbars may have the connections to accomplish an RCA connection just because they take an “everything and the kitchen sink” mentality, and some mid-range models have these connections because they know you might be using a more dated Television, but many premium soundbar options don’t bother including RCA jacks at all.
Using a Soundbar with a Receiver
So, now that you understand the various methods you may want to use to connect your soundbar directly to the audio source, there’s one more option you might be wondering about (in addition to setting up a microphone with it which we have a guide on). If you currently have an amplifier or a receiver, you may be wondering if you should connect your soundbar to your Television using that equipment. Even if you don’t already have the equipment on hand, you may be wondering if adding an amplifier or receiver will increase the sound quality (it will – we’ve explained why before) We have another article talking in more detail about this, but the long and short of it is that you probably don’t want to be using an amplifier or receiver with your soundbar. First, a setup with a receiver and a soundbar leads to added complexity, with more hardware and cables to manage that aren’t going to get you anything extra. If you’re soundbar doesn’t have the available ports to support the level of audio quality you want, then adding a receiver is not going to get you there, because soundbars are not designed to work with receivers. And in some cases, using an amp that drives signal to your soundbar can damage speaker equipment. This is because soundbars are typically doing the amplification on their end, so sending a signal to a receiver/amplifier and then the soundbar will result in the signal being amplified twice, which can damage your equipment.
Conclusion
As you can see, each of these options has different pros and cons, and should be used for different purposes. An optical cable might get you a high-quality signal across its fiber-optic cables and make installation simple. But, HDMI Arc may offer features that you see value in, like reducing the number of remote controls you might need to juggle while using your system. Bluetooth will add flexibility, and bring you closer to the dream of a cable-free setup, but at the cost of some signal quality issues and limited bandwidth that prevent you from using advanced audio standards like Dolby Atmos. And RCA may allow you to connect to more legacy Television models. Be sure to choose the right method for your setup, that optimizes for your end goals. Home theaters can be expensive, confusing projects, but when it comes to soundbars the simplicity is a breath of fresh air. But you plan your setup and know what connection method you want from the start to get all the benefits a soundbar can offer.


